Your Basic Guide to Do it Yourself Floor Demolition
A new floor can change the entire look of a home. It’s one of the most important design elements of a building. Flooring is a necessity. And, it’s one design aspect of your home which is used in each and every room. For those living in a home which flooring they neither like nor feel comfortable with, renovation is always an option. If you’re considering renovating your home flooring, but don’t want to spend the money on floor demolition, there is a lot to learn. So, to help those who wish to remodel flooring on their own, we’ve come up with this go-to guide for do-it-yourself floor demolition.
DIY Floor Demolition and Remodel Step #1: Remove Fixtures and Appliances
If you’re demolishing tile, you’ll need to remove anything which rests on top of the tile surface before floor demolition can begin. Otherwise, appliances and/or fixtures may be damaged during demolition. To remove toilets and sinks, first shut off the access to water so no flooding occurs. Then, if removing a toilet, expel any water still within the bowl or resevoir. Finally, unscrew bolts, lift the fixture with care, and place in a safe spot until new flooring installation is complete.
Remember, if you have baseboards which are applied on top of tiling, you may need to remove them before floor demolition. Damaging baseboards is almost a guarantee when removing tile if they aren’t removed first. To remove baseboards quickly and effectively, insert end of crowbar into top seam of baseboard and use wall as leverage to rip both board and nail from drywall. It’s easy to damage drywall if you aren’t careful. So, if you’ve never done it before, have a handy friend help or seek professional services.
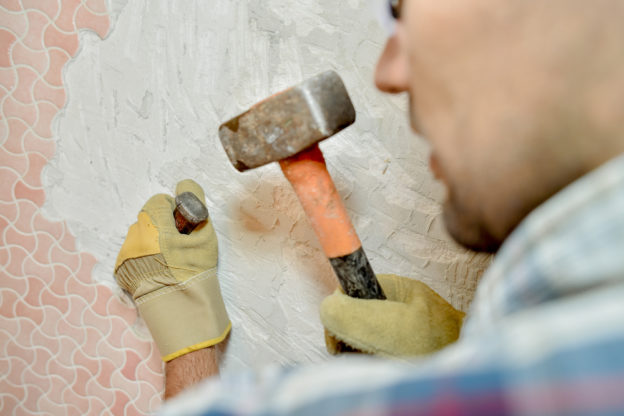
Floor Demolition Step #2: Choose a Spot to Begin
Before you jump right into demolition, you’ll need to choose a starting point. It’s best to start from one corner and end up on the other side of the room. That way, you only have one area you’re working on at all times and there is less confusion. Once you’ve chosen a spot to start, don’t forget to put your protective gear on(eyewear, gloves, knee pads, face mask). Using a chisel and hammer, carefully begin to remove tiling. As you go, throw away chipped, broken, and removed tile so that clean up is happening as you progress with removal and you won’t have to go back to pick up large, heavy piles of tile.
Floor Demolition Step #3: Repairing Subflooring
If the tile your demolishing wasn’t installed directly onto concrete, there is a big risk that you’ll damage some of the subfloor or underlayment of your tile. So, once tile is removed, you’ll need to check for holes, chips, and uneven surfaces. You won’t be able to apply new flooring until subflooring is prepared and ready to go. So, either repair or replace subflooring where needed before considering flooring installation.
Floor Demolition Step #4: Cleaning Subflooring for Installation
Before you can regrout for tile or install another kind of flooring, the subflooring you’ll install onto needs to be perfectly clean. Nails, glue, and debris can all cause uneven surfaces, so they have to be removed prior to installation. Additionally, subflooring must be swept and removed of any dust, which may seem virtually impossible after tile removal. If there is dust, new glue or other adhesives may not work as they need to in the installation of your new flooring. Removing tile comes with heaps of dust which may take days to settle. So, cleanup may take up to a week or two.
Skipping the Hassel and Going with the Professionals
All in all, floor demolition is a big job. It’s easy to assume that it’s a quick and simple process. And, while it’s not rocket science, it’s not something that’s easy, fun, or quick. Most people understand the time, energy, risk, and work which comes with floor demolition, so they understand that DIY floor removal may not be the best option. Furthermore, when it comes to the risk to damaging subfloor, repair, mistakes, and renting of proper disposal units (which is mandatory in most states) that comes with most DIY floor removal jobs, it’s not even the most cost-efficient option.
So, instead of planning for the hassle that DIY floor removal will inevitably cause you, consider the experts at Dustbusters Floor Removal. We’ll take care of the entire process, from start to finish, and you won’t have to lift a finger!