Author Archives: dsquared

Dos and Don’ts of Flood Repair after Hurricane Irma

Dos and Don’ts of Flood Repair after Hurricane Irma

Here in South Florida, it’s no surprise that residents are resilient to all that comes with getting hit by a hurricane. But, with the massive power that was Hurricane Irma, many homeowners have found that their housing just couldn’t handle the massive winds and rains. Fortunately, Florida is a place where all residents understand the heartbreak that comes with these extreme storms. So, after each hurricane, our streets, homes, and lives are quickly rebuilt even stronger than before. If you’re a Florida resident who has been impacted by the giant force of Hurricane Irma, you’re surely ready to get back on your feet and into your home once again. If you’ve experienced roof leaking or heavy rains, you may need some flood repair services to do so. Check out these steps to what homeowners should do after hurricane flooding.

When Conducting Flood Repair Remember that Safety Comes First!

You may be anxious to get out and start removing waste and damage as a result of flooding. But, remember to keep safe as flood waters are not just rainwater. They can contain a number of toxic components like harmful bacteria, chemicals, and even sewage waste. If it’s possible, don’t go out into flood waters at all. But, if you do have to work in flood waters or even after they’ve evaporated, make sure to utilize as much protection as possible. This includes high rubber boots, gloves, and safety glasses. Additionally, be sure to thoroughly clean your entire self immediately after working in flood waters.

Be Prepared to Offer Your Insurance Company Proof of Damage

Undoubtedly, one of the biggest downfalls of flood repair is the financial expense. But, fortunately, South Florida residents are required to invest in homeowners insurance. While not every plan may cover the damage of flooding, it’s a good idea to try to get as much repair covered with insurance as possible. This way, if there are any out of pocket expenses, you’ll be more able to afford them. So, it’s extremely important to document any flood or hurricane wind damage BEFORE you begin the repair process. Take pictures of any damage done after the hurricane to provide to your insurance adjuster so that they can assess the amount owed to you.

Before Flood Repair Clear Out Flood Waters

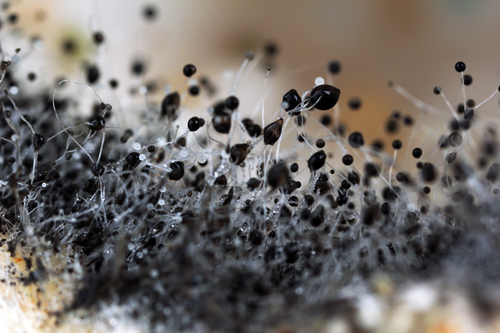
The longer flood waters stay in a house, the more flood repair there is to be done. Flood water can do all types of damage if it isn’t ventilated fast. It can ruin drywall, insulation, electrical wiring, cabinets, trim, and flooring. Furthermore, the longer water sits, the more potential for health concerns like mold and mildew. So, to prevent even more damage, you should do as much as you can to get water out of the house immediately. To accomplish this, open all windows and doors of the house. And, if you have them, utilize fans and dehumidifiers to help boost the water drying process. However, if the home has a central a.c. unit installed, do not attempt to turn the system on until all water is eliminated and the unit has been checked by a professional. Turning on central a.c. units after flood damage can damage the entire system, not to mention blowing the harmful chemicals that flood waters have created or brought into your home.

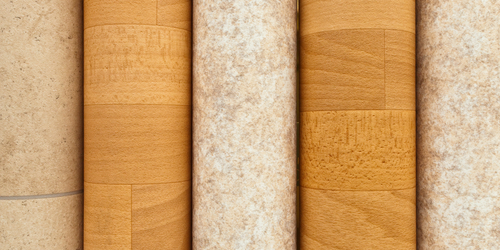
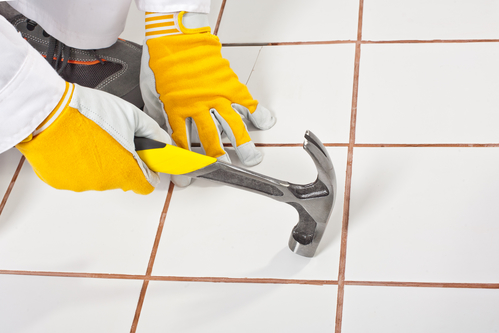
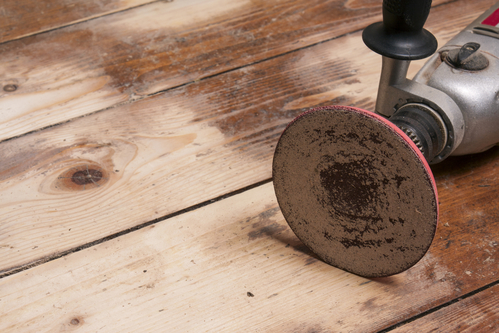
Removing Flooring During Flood Repair

Once all of the water is gone from the home, it’s finally time to start on flood repair. More often than not, flooding will damage flooring. Removing this flooring can stir up the harmful chemicals and fungus that flood waters may bring. But, you don’t have to go about it yourself. Let the professionals handle it for you in a safe, quick, and effective way. We’ll even throw the debris for you at no extra cost! Plus, our innovative technology allows us to remove flooring with a dust-free system. This way, you’ll be able to go about your flood repair and new floor installation as soon as we’re done with the job! If you are interested in hiring a professional South Florida floor removal service to deal with some of your flood repair, give Dustbusters a call today at 866-883-8783.


tile dust

Tile Dust Dangers and How to Avoid Them

It’s no surprise that there are a variety of risks that come about during any sort of home renovation project. Still, one major risk of floor projects that most people don’t think about is the release of tile dust into the air. Now, dust is the collection of microscopic remnants of various broken down materials. It can gather everywhere, on or beneath any surface. It can even be formed from the deconstruction of hard materials like tile. For the most part, dust is seen as a harmless but inconvenient thing. However, long-term exposure to tile dust can bring about a number of health issues.

Bacteria and Fungi

Even the most spotless house contains some degree of bacteria and fungi. In fact, the average American household is a breeding ground for an estimated 7,000 types of bacteria and 2,000 variations of fungi— all of which can be found in dust. During renovation projects, any of the bacteria or fungi trapped under the tiles can be released into the air with the tile dust when flooring is removed.

The Chemicals in Tile Dust

Dust is basically just a collection of waste particles. Still, not very many people stop to think about what dangerous things dust can contain— especially tile dust. Any number of chemicals can make up dust particles, and with prolonged exposure, your chances of developing certain health issues begin to increase. This is especially true for tile dust that contains crystalline silica.

The Dangers of Crystalline Silica

Many popular construction materials contain a material called crystalline silica. This is a basic component that makes up most soils, sands, and similar minerals that are compressed and used to create construction and flooring materials. Some of these materials include:

  • Brick
  • Glass
  • Marble
  • Masonry
  • Mortar
  • Quartz
  • Stone

In flooring renovations, the tile is broken apart and removed. During this process, crystalline silica can be ground down to microscopic particles and released into the air as what is essentially tile dust. And with the increased popularity of polished concrete and tile flooring, this release of crystalline silica tile dust during renovations is now more common than ever. So, what exactly is the danger?

According to the Occupational Safety and Health Administration (OSHA), inhaling crystalline silica particles can lead to a variety of health complications. Crystalline silica has been officially classified as a lung carcinogen; this means that constant exposure to this tile dust can cause serious lung problems. Since crystalline silica dust is basically just microscopic shards of tile, they can do a lot of damage when they enter the lungs. This includes, but isn’t limited to:

  • Susceptibility to tuberculosis and other serious lung infections
  • Increased risk of asthma and other respiratory illnesses
  • The formation of interior scar tissue in the lungs
  • Overall reduction of lung function
  • The development of silicosis

While most of these conditions can be treated with medication, silicosis can be fatal and currently has no cure. Thankfully, the chances of contracting any of these health conditions as a result of breathing in tile dust are pretty slim. Furthermore, more common conditions like occupational asthma are temporary and not as hazardous; just unpleasant.

Occupational Asthma

Allergies triggered by normal dust can include nose, throat and eye irritation. However, these symptoms worsen tenfold with long-term exposure to tile dust. In fact, it’s pretty common for inflammation in the nose, throat, and eyes to occur. This has become known as ‘occupational asthma’ and is one of the most common consequences of crystalline silica tile dust inhalation. According to the American Academy of Allergy Asthma and Immunology, occupational asthma affects about 15% of construction workers and do-it-yourselfers.

Avoid Tile Dust with Dustbusters

Tile dust inhalation is something to avoid during any sort of renovation project. If you need your tile, hardwood or even carpet flooring removed, avoiding tile dust is nearly impossible if you take on the project yourself. This is why dustless floor removal is so important. With Dustbusters, you can breathe easy knowing that your project will get done without running the risk of inhaling tile dust. Our team uses state-of-the-art flooring equipment to ensure a safe, quick and dustless floor removal. Call us today at 866-883-8783 for the best floor removal service in Florida.

New Tile Trends to Consider for your Renovation This Year

New Tile Trends to Consider for your Renovation This Year

Tile has been a choice in home design for hundreds of years. But, that doesn’t mean that tile can’t get dated. Because flooring is such a huge part of design, switching up your tile could mean a whole new look for your entire house. If you are thinking of renovating your flooring and wanting to go with tile, consider these new tile trends seen in home design.

Not So new Tile Trends: Subway Tiling Options

OK; so subway tile has been around for generations. But, that’s just a testament to how resilient the design of subway tiling really is. Standard subway tiles are 3×6 inches and white. This design is commonly used on bathroom flooring and shower tiling. Today, subway tiles can be purchased in different sizes, whether larger or smaller. Additionally, consumers aren’t restricted to the common white coloring. Currently, subway tiles of all colors are considered new tile trends. And, subway tiling isn’t restricted to bathrooms. Consider this trend as an option for a kitchen counter backsplash or in your laundry room for a fresh and classic design.

Patterned New Tile Trends

Patterned tiling creates a standout design that can give a room its character. Whether you decide to utilize patterned tiling as a focal point of a room or for the entire flooring, it can change the whole feel of a room. If you’re wanting your tile to make a statement, patterned tiling is the best way to go. With millions of patterns, colors, and textures to choose from; you may not be able to make a decision right away!

Porcelain Tiling Mirroring Wood and Brick

Although a tile trend for a few years, porcelain tiling made to mirror the look of wood floors are still a popular choice. This option is great for homeowners who would otherwise be unable to purchase wood floors due to high moisture levels or highly rough use. Porcelain is a stone which guarantees many years of damage-free use. And, with a wood finish, provides a beautiful appearance which matches any home decor. Porcelain tiling mirrored to look like wood flooring also comes in a variety of colors that may not be available to classic wood floor buyers.

Along with offering options for porcelain tiling with wood design, porcelain tiling also comes in a brick design. This flooring is great for individuals who want to incorporate the red brick look into their home without having to actually lay brick. Brick options come already whitewashed or to match the classic red brick style.

Getting Help with your New Tile Trends and Renovations

Thinking of doing a renovation and incorporating new tile trends into your home? If so, leave the mess to us at Dustbusters. Removing tile can be a strenuous, time consuming, and frustrating process for the do-it-yourselfer. Not only does the process include chipping, scraping, and hauling away heavy and sharp tile pieces, but it also comes with a fair share of dangerous dust. By investing in a dust-free professional tile removal service, you leave all the dangers and mess of a tile renovation to us. With our innovative system, harmful dust caused by tile removal is sucked up before it can even release into the air.

Additionally, our professionals know how to remove flooring, grout, and thinset quickly and perfectly. This leaves you without having to extend your project timeline to conduct back-breaking tile removal yourself. Lastly, removing tile yourself means investing in a costly dumpster service. This is because most garbage removal services will not pick up renovated items, especially heavy tile. By utilizing our services, you won’t have to move a muscle as we also take care of removing demolished materials off your property.

If you’re ready to start your tile renovation process, give us a call at Dustbusters today! Let our dust free tile removal technology handle your old tile so that new flooring can be installed the next day!


Installing Vinyl flooring

Pros and Cons of Installing Vinyl Flooring

Vinyl flooring has been around since the 1930’s, but lately, it has had a resurgence making it an immensely popular style again. It’s a type of resilient flooring that comes in the form of sheets. Installing vinyl flooring doesn’t require a lot of tools or complicated instructions making the process much easier than if you were to install tile or wood. This is an investment that would make any frugal homeowner reconsider what kind of flooring to install.

Pros of Installing Vinyl Flooring

Vinyl flooring is popular for several reasons. The material itself is essentially polymerized plastic. Therefore, it is very affordable for those trying to save money. Vinyl flooring is also exceedingly durable mainly due to the fact that it absorbs upon contact. No matter how much you stretch or bend this material, it always returns to its original shape. Homeowners usually enjoy the fact that they can drop heavy items on the floor and they never see so much as a dent. This is great for home owners that have a lot of foot traffic in their residences. Another reason it became so popular is that it doesn’t make any sound when you step on it. In homes with hardwood floorings, you may hear occasional squeaking. And with tiles, you usually hear footsteps. Interestingly, vinyl flooring is a sound absorbent material so parents won’t hear their kids running around the house. Some people enjoy the peace of mind that they get from a quieter home. Another benefit of vinyl is that it is fire-resistant, so there is no need to worry about pesky fires ruining your floor. Lastly, installing vinyl flooring only takes a couple of minutes. It’s so easy that homeowners usually do it themselves. All you do is add adhesive to the bottom of the sheet and simply roll it out on the floor.

Designs of Vinyl Flooring

Vinyl is a very versatile material. Manufacturers use this same material to make golf balls, records, soles of shoes and piping. During the 1960’s, as technology advanced, so did vinyl flooring. Designs became more complex and manufacturers learned to give vinyl the same appearance as tiles. You can order vinyl in just about any style; checkered or striped. In the 1970’s, it was discovered that you could cut vinyl into planks, giving them the appearance of wood. Homeowners loved the fact that they could purchase flooring that looked just like wood but with all the benefits of vinyl. Not only does this material have all the usual benefits mentioned before, but it’s also water-resistant too. Installing vinyl flooring in this design is as simple lining up the planks and using adhesive to bond them to the floor, making this an easy pet project.

Cons of Installing Vinyl Flooring

There aren’t many disadvantages to using vinyl as your flooring. One complaint that individuals have is that while vinyl flooring is water-resistant, it is not always stain-resistant. However, this only happens if you leave liquids on the material for a long period of time or if your residence has experienced a flood. Liquids may seep into the fibers of the plastic and cause discoloration. However, you can simply replace the stained section instead of replacing the entire flooring. Just remove the plank or affected tiles and replace it with tiles ordered from the same manufacturer. Another issue is that customers often want to use bleach products or ammonia to clean the floor. This is not advised because the chemicals could damage the material and cause discoloration. It is suggested that individuals use floor cleaners recommended by the manufacturer. Otherwise, the floor only needs to be swept or vacuumed. You can mop the floor, however, you should only do this occasionally so as to prevent staining.

Moving on to Something New

If you’re thinking about installing vinyl flooring, however, you’re worried about removing your old flooring, give us a call at DustBusters. We offer residential and commercial floor removal services at competitive prices. Additionally, we utilize industrial vacuums during the floor removal process because we are committed to providing customers with a dust-free environment. Give us a call at 866-883 for more information or email us at service@dustbustersfl.com.

floor renovations

The Benefits of Doing Floor Renovations Before Moving Day

Buying your first home is one of the most exciting and rewarding experiences you’ll have your whole life. You have a space to call your own and the freedom to make it whatever you want. Most people make significant changes like re-painting the walls, installing new appliances or even installing new flooring. Floor renovations, in particular, are a time-consuming process.

This is why a lot of people tend to get it done before moving day. In fact, a whopping 53% of new home buyers start at least one home improvement project within three months of buying the house— and it’s usually flooring. Getting floor renovations done before the move has a lot of advantages, like the ones listed below.

No Furniture to Work Around or Move

This is probably the best (and most obvious) advantage to getting floor renovations done before the move. First of all, you can examine your floors more thoroughly without furniture in your way. Secondly, having old or worn flooring removed before the move makes the job much easier for the professional. This way, they won’t have to deal with the extra hassle of clearing up space to work.

No Stressful Navigation

Floor renovations, in particular, are very stressful. It’s not a small portion of the room being worked on— it’s the whole floor from wall to wall. This can be challenging to navigate. Your mobility could be limited if the floor being renovated connects two opposite sides of the house. No one wants to have to navigate around the renovation just to get from the bedroom to the kitchen. By getting any flooring renovations you have planned finished before moving in, you won’t have to worry about finding alternate routes from one room or another or staying out of the contracting team’s way.

No Rush

Renovations that come after the move tend to be rushed. Not physically, of course, but psychologically. If you move into your new home before floor renovations are finished, you can expect to see specialists and contractors for days at a time. The constant run-ins, furniture rotations and tiptoeing around the work will drive both you and your professionals-for-hire crazy. You’ll be itching for them to finish and leave so you can finally have your new place to yourself. That’s no way to go about your first few days in a new home. Instead, have the flooring done before the move to avoid all this. You can spend your time making other preparations while the flooring team can work in peace with nothing (and no one) in their way.

No Leftover Mess

The worst part about floor renovations is how messy they can get. When old flooring is de-installed, the dust that gets released into the air might end up coating surrounding furniture or unpacked boxes. Now, some flooring companies offer to clean up, but usually, they only do it for the floor they’ve just installed. Once the team leaves, you might have a shiny new floor, but your furniture and everything else will probably need a thorough wipe-down. If you get flooring done before moving day, the only cleanup you’ll have to worry about is vacuuming.

No Exposure to Harsh Odors or Substances

The first step of any floor renovation is, of course, removing the old floor. Floor removal is a tedious process, and also very unsafe for non-professionals. Breathing in the dust and other microscopic particles that get released when the floor is removed (mold spores, algae, etc.) can be a major health hazard if you’re exposed to it for too long without any gear to protect you. This is a problem that comes with post-moving floor renovations. When you get the flooring done before you move in, you aren’t exposed to anything that might be hazardous to your health.

Start Your Floor Renovations with Dust Busters

Moving is already stressful enough. You can make it less complicated by at least starting some of your home improvement projects before the moving truck comes. These are just some of the many reasons why getting floor renovations done before the move is a huge relief— for both you and the professionals working on your floor. If you need a hard-working team to take out your old floors to “pave the way” for new ones without leaving dust behind, calls Dust Busters at 866-883-8783.

DIY tile removal

Why DIY Tile Removal is Always a Bad Idea

How Hard Can It Be?

This is always the question that a do-it-yourselfer asks themselves before taking on a home renovation project. Normally, DIY projects are reserved for simple tasks that would save money, time and trouble. There are some renovation projects that someone with even a little bit of experience and an internet connection can manage to do on their own. But is a DIY tile removal project one of them? The short answer is no, and here’s why.

What DIY Tile Removal Really Entails

You wouldn’t think so, but removing floor tile is actually an incredibly difficult and insanely time-consuming process. The major issues, though, are the ones you don’t know about until the project actually starts. Depending on the construction of your home, the tile could be attached to anything from cement to mason board underlayment. So, what exactly does this mean?

It means that whatever is beneath the surface will determine how long the project will take and how hard the tiles are to remove. You’re not just popping tiles out and setting them aside to reveal a smooth, ready-for-renovations floor underneath. Floor tile removal involves a lot of chiseling, breaking, hauling, dusting, and aching— plus the added risk of damaging both the underlayment and the subfloor.

The If’s and When’s of DIY

There’s no easy DIY tile removal process, and there’s no one way of removing tile.

If your floor is concrete, removing tiles requires literally knocking them up and breaking up the adhesive with hammers and chisels. Without experience or the right tools for the job, you can easily hurt yourself or damage your floor trying the DIY method.

When the underlayment is removed with the tiles, you’ll need to either pry out or hammer in any exposed nails you come across. Failing to do so not only makes later installation challenging but is also a huge working hazard. Hopefully, you’ll have found any exposed nails by looking for them instead of stepping on them.

If you don’t know what you’re doing, you might jeopardize the integrity of your floor by missing a big issue. For example, treating rotten wood or replacing divots in the concrete is necessary to keep the foundation smooth and even when the new flooring gets installed. An inexperienced DIYer might miss this and end up laying a new floor over an unsafe foundation.

When all is said and done, there’s always going to be a huge mess to clean up. The room is going to be filled with broken tiles and coated with hearty amounts of dust. Clean-up time will be about the same— if not more— than the actual removal tile process.

The (Literal) Weight of the Work

Everything listed above would be too much for even the most determined DIYers, but one major part of floor tile renovation projects that most people fail to take into account is the actual removal of the ripped-up tiles from the premises. Transporting the remains of what used to be your tile is just as time-consuming as the process of breaking them up. Despite what you might think going into the project, the garbage collectors aren’t going to take the broken tiles away for you. The remnants of most home renovation projects require a special kind of removal that can’t be covered by just hauling it to the dump. Remember, landfill dumping costs are based on weight, and that’s an extra expense for the DIYers.

Why DIY is Expensive

The main reason anyone attempts DIY tile removal in the first place is to cut back on renovation costs, but this is counterintuitive for a number of reasons. As previously stated, the DIYer is going to need access to certain things for a successful DIY tile removal, like the tools for removing the tile, the tools for the cleanup, and the means of taking the ripped-up tile to a proper disposal site. This, coupled with the likelihood of needing professional help anyway to fix your inevitable mistakes, makes DIY tile removal more trouble than it’s worth. You’re better off using a professional tile removal service. You’ll save time, money, and a whole lot of aches and pains.

Do Better Than DIY Tile Removal with Dustbusters

Tile removal takes time, hard work and a certain amount of expertise that keeps the project on track without risking damage or costly do-overs. At Dustbusters, our renovation specialists can handle your floor tile removal, cleanup, and disposal for you, all with minimal dust and mess. If you have any questions about our process or what to expect, give us a call at 866-883-8783.

Choosing the Best Flooring Options for your Home

Choosing the Best Flooring Options for your Home

If you are in the middle of a redesign or your floors are just simply outdated, you’ll need to choose new flooring. But, what are the best flooring options for your home? There are undoubtedly a few things you will need to consider before making a decision to protect your investment. After all, you want the flooring that you choose to look great, last long, and suit all of your needs!

What to Consider before Choosing your Best Flooring Options

Flooring Intention: What is the intention of your flooring? For example, if you need flooring that you know will get wet often, you may want to stay away from choosing hardwood flooring. Or, do you need new flooring in a high traffic area? You may wish to choose a material that is resistant to scratches. Each room of your house has a purpose, and the flooring in each room shouldn’t deter the room from providing its purpose.

Home Needs: Obviously, one of the main concerns you should have when choosing new flooring is your own needs. Do you have pets? You may wish to choose flooring which will prevent scratches. Do you have small children? Consider softer carpets. Do you have allergies? You may wish to go with a flooring option that is easier to clean like wood or tile. Whatever your needs as a family or individual, consider these before you make your final choice.

Upkeep: Different rooms of your home get dirty for various reasons. Make sure that the flooring that you choose for a room suits your maintenance schedule. For example, if you like to mop your kitchen floors to keep sanitary, choosing wood floors isn’t the best option because they do not do well with moisture. Keep in mind your cleaning style and needs before choosing the flooring in each room of your home.

Aesthetics: Of course, you want the flooring to look great. Also, you want the flooring that you choose to look good with another flooring in the house. If you have carpet in the bedroom but you are redoing the area outside the room, choose a flooring option that looks good next to the carpet. Additionally, make sure that you choose a flooring option appropriate for spacing. For example, in a bathroom, carpet can hold bacteria and water unfit for safety. Although it was acceptable in houses 30 years ago, it’s just simply an eyesore to have carpet in a bathroom today. Instead, go with a flooring that pairs well with the rest of the home’s floors.

Flooring Options to Choose From

Carpet: Great for bedrooms and child rooms, carpet provides both a soft look and touch. Different selections can provide you with texture, length, and color. But, carpet can be hard to maintain as it soaks up liquid and stains easily.

Wood: Natural wood is arguably the most beautiful type of flooring option. But, it definitely has its drawbacks. Being of wood, naturally, it does not do well with liquid or any kind of moisture. So, maintenance is restricted to dusting and sweeping.

Laminate: A great option to wood flooring, laminate doesn’t damage when cleaned with water. Also, it is a cheaper option that wood. Providing a number of colors and styles, this option is a beautiful one. The downside is that it may not last as long as real wood flooring or be as stunning.

Tile: The most resilient of your flooring options, tile comes in many different styles, shapes, patterns, colors, and even materials. It is completely waterproof, so it’s best for areas like bathrooms and laundry rooms. But, grout and tile may show dirt quicker and be harder to clean than other flooring solutions.

Selected from the Best Flooring Options?

If you are looking to redo flooring, make the process easier and faster by hiring a floor removal service. Dustbusters can save you time and energy by removing you flooring in a single day with our dust-free system. This means that there is absolutely no clean up for you after we finish! If you are interested in seeing how we can remove your floors in a clean, fast, and healthy way, please visit our website or give us a call at 866-883-8783.

mold under linoleum

Safely Getting Rid of Mold Under Linoleum Flooring

Certain types of materials, like linoleum, are susceptible to mold infestations. Linoleum is a very sturdy material, however, if it isn’t regularly cleaned and sealed formations begin to take hold. It’s important to clean and remove mold under linoleum flooring as soon as you notice it. Otherwise, infestations can cause serious health hazards for anyone living in the building.

Most Common Types of Mold

Different types of mold can grow on a number of surfaces. The three most common types of mold found in homes are Aspergillus, Cladosporium, and Stachybotrys. Aspergillus is a mold commonly found in foods and in AC units. Cladosporium typically grows in air ducts and bathrooms. These types of mold can cause minor allergic reactions in humans and animals. Stachybotrys, also known as “black mold”, is commonly found on carpet, linoleum, insulation, drywall and other surfaces. In small amounts, mold exposure isn’t regarded as a health issue. However, if mold growth continues unmanaged the results could be harmful to you and your family. This is why it is vital that individuals clean their homes and attempt to remove any mold under linoleum.

Harmful Effects of Mold Under Linoleum

Having mold in your home can be very dangerous for anyone living under your roof, especially small children and the elderly. Mold can get into an individual’s lungs or mouth, causing the individual to have an allergic reaction. Here are some of the short-term effects of mold:

➢ Trouble breathing
➢ Nasal congestion

➢ Nose bleeding

➢ Headache

➢ Upper Respiratory tract infection

➢ Eye irritation

➢ Rashes

➢ Sore throat

After long exposure to heavy amounts of mold, serious and even deadly side effects can develop. Here are some of the long-term effects:

➢ Cancer
➢ Acute idiopathic pulmonary hemorrhage

➢ Hypersensitivity pneumonitis fibrosis

➢ Neurotoxicity

➢ Cardiac conditions

These effects can be disastrous to expectant mothers, the elderly and young children. If you are concerned for your health after exposure to large amounts of mold, please consult your doctor.

Removing Mold Under Linoleum

Removing mold from your home or building can be a very costly project depending on how bad the infestation is. If mold has just started to grow in your home, then you can still save yourself the expense by cleaning and taking precautions. Here’s a step-by-step process of what to do:

Step 1. Remove any sources of moisture in the infested area. The EPA even states that the best way to control mold growth is to remove moisture buildup in the building. If there is water damage in your home, then you will need to fix the damage to get rid of the mold.

Step 2. Seal off the rest of them home. HGTV recommends the use of heavy plastic to seal off doorways and entrances leading to the room with the infestation. You need to do this to stop the mold from spreading to the rest of the home. Use duct tape to secure the heavy plastic on the doorways and entrances.

Step 3. Get up and Suit up. For the next step, you’ll have to put on a few things to protect you from the mold. Put on a facemask or respirator. You’ll also want to put on protective clothing, which will prevent mold spores from landing on your body. This means covering your head, legs, and arms. Make sure you are thoroughly protected before moving on to the next step.

Step 4. Cleanup on Aisle 4. Grab a sponge and some heavy-duty soap to clean any mold you can see. Then use mold removal products found at your local hardware store. These commercial products will be sure to kill off any mold it comes in contact with. Be sure to clean the surrounding areas, because they may have mold infestations that aren’t visible yet. After you are done, you’ll want to put all of the materials you used in the garbage. Don’t reuse any of the protective clothing or sponges.

Getting Rid of Linoleum

Locating and cleaning mold under linoleum is no easy task. Sometimes the infestation of mold under linoleum is so severe that you have to get rid of the entire floor. If that’s the case, then give us a call at 866-883-8783. We get rid of any harmful residues, chemicals or even molds in the buildings we clean. Our team at DustBusters is committed to safely removing and cleaning floors in an efficient manner.

Floor Removal Services

Types of Tile Demolished by Floor Removal Services

There are many types of tile currently available on the market. Some of these tiles have a lot to offer, like durability or natural looks. Still, tiles aren’t built to last forever. They can crack, get moldy, stain, chip or flake. For this reason, removing tile can be a tough process. Below is a list of tiles that are the most frequently removed during floor removal services.

Tiles Frequently Demolished by Floor Removal Services

Ceramic Tile – This tile is one of the most common types removed by our services. Ceramic tile is a non-metallic material consisting of clay, carbon, silica, and talc. These ingredients are mixed together, heated and left to harden to create tiles. Ceramic can be expensive or inexpensive, depending on whether the tile is glazed or not. If the tile is not glazed, then it would require routine maintenance to prevent staining.

Porcelain – Porcelain is a heavy tile made of a clay called kaolin and bone china. This material was first developed in China over two thousand years ago and was later spread to East Asia and Europe. This particular material is popular due to its durability and translucency. It’s easier to maintain than ceramic tile because it’s water and stain resistant. Porcelain can also be made to easily imitate the look of natural stone.

Travertine – Travertine is made from limestone. The material is also very durable and low maintenance. Homeowners never need to seal Travertine and it usually keeps its appearance for years. However, there are two main concerns with this type of tile. First, this material is very slippery, which can cause accidents if residents aren’t too careful. Second, this material can be expensive.

Slate – Slate tile is exceedingly durable and is used in homes with a lot of foot traffic. It’s beautiful, environmentally friendly and can increase the value of homes. No chemicals are ever used in the process of making these tiles. However, one of the main concerns with slate is that it requires frequent sealing and resealing. If sealing isn’t done properly, the material will sometimes flake off.

Saltillo – Saltillo is a form of terracotta tile, which often comes from Mexico. This tile is very inexpensive and easy to obtain. Saltillo is considered environmentally friendly due to the fact that it is made from heated red clay. However, Saltillo tile isn’t very durable and is often uneven because individual tiles are handmade. The material chips and cracks fairly often.

Linoleum – This material is the most durable and cost effective on this list. It was designed to resist impacts and cuts and is also very easy to install. The main disadvantage to linoleum is its susceptibility to mold. If the sealing begins to peel, then water can seep into the cracks, causing mold to spread. Linoleum is also prone to yellowing as it ages, meaning that the entire floor would need to be replaced every few years.

Natural Stone Tiles Demolished by Floor Removal Services

Marble – Marble is a very expensive type of tile. Of all the tiles on this list, marble is typically regarded as the most beautiful. This material offers a natural look that most stones don’t, including swirls and stripes of color. Marble is also very reflective, typically illuminating rooms with any light that touches it. The main disadvantage of marble is that it isn’t very durable. The material stains, cracks and scratches if not treated with extreme caution. Sadly, chemical cleaning substances can cause the stone to break down.

Granite – This stone is very similar to marble. Granite is a rock that forms under intense heat and is characterized as being very dense and durable. However, as time passes, granite is prone to be stained by the grout used to set the stone in place.

Limestone – Many people compare the look of limestone to that of wood due to the natural grooves that form on the rock. Limestone requires a large amount of work to maintain. However, if it is done properly the material will last for decades. Otherwise, it can crack, stain and chip. Interestingly, limestone is very popular because it is cold to the touch, so it is ideal for warmer climates. Still, limestone can become slippery when wet, so exercising caution while cleaning is wise.

Floor Removal Services at Dustbusters

At DustBusters, we provide quality service to efficiently remove all forms of tile, no matter their durability. Customers can trust our business to provide floor removal services that leave your home dust free. If you’re interested in a professional, less expensive, and higher quality floor tile removal, call Dustbusters today at 866-883-8783.


Hardwood Floor Resurfacing Vs. Investing in New Flooring

Hardwood Floor Resurfacing Vs. Investing in New Flooring

If your home has hardwood flooring, you may wonder whether you should refinish the wood flooring you already have or replace the flooring altogether. There are pros and cons to each method, and it all depends on your preference and the condition of your floors currently. Discover the pros and cons of both floor resurfacing and replacing to make the best decision for your home, family, and wallet.

Pros of Hardwood Floor Resurfacing

Cost: Replacing hardwood floors takes many steps; demolition, fitting, and installation. With simple floor resurfacing, only one charge is deducted because only one service is utilized. Additionally, replacing floors takes purchasing new wood flooring, which is undoubtedly the most costly route to redoing wood flooring. Floor resurfacing does not call for the use of any new products, saving you financial costs in the process.

Precision: If you are already pleased with the wood type, positioning, and styling of your wood floors, refinishing is the best way to keep them the same. A new installation and different wood types may need a redesign, giving your flooring a different look and feel. The best way to keep the flooring you have but get a fresh and bright new look are to go with a floor resurfacing company.

Cons of Hardwood Floor Resurfacing

Time: In most cases, floor resurfacing takes much more time than complete renewal. The process is one which takes time to sand, polish, and sit for up to five days in total. During the process, the floors cannot be touched at all, which may cause you and your family challenges throughout daily life.

Underlying Problems: If your floor is creaking, leaking, cracked, aged, rotten, or any other type of damage, simply refinishing them will not repair the underlying problems. With only a complete renovation can floorboards, which are what hold up the wood flooring, be examined and repaired/replaced. Keep in mind that hardwood floor resurfacing is only aesthetic; it is not problem-solving.

Mess: Floor resurfacing is not only a time-consuming process but a messy one. To resurface a floor, the wood must be sanded. This sanding creates piles of dust that are circulated into the air, picked up by your air conditioning system, and a safety hazard to you and your family. Additionally, since dust is so light, it takes time to settle. This means that you will be cleaning up dust around your home for days, weeks, or even months after the resurfacing project concludes.

Pros of Hardwood Floor Replacement

Eliminate Issues: Damaged floors simply should not be resurfaced because the underlying issues need addressing to prevent safety hazards. With a whole new wood floor, you won’t have to worry about the age, condition, or safety of your floors. Unless you simply need to get scratches or sun fading out of your hardwood flooring, a full replacement is the way to go.

New Configuration: A new hardwood floor means new materials, stains, and even positioning. This means that if you want your flooring to be placed horizontally instead of vertically as they were previously, it can be done with brand new flooring. Additionally, this gives you the chance to change the type of wood and coloring used throughout your home.

Cons of Hardwood Floor Replacement

Price: The cost of materials and labor is usually more with a complete overhaul. Although the price is a little bit more, you get what you pay for. Because resurfacing your floors is merely an aesthetic fix, you’re paying for a service even though you may have to completely replace your floors in a matter of a couple years due to wear and tear. So, although the price is a bit more to replace floors, you’re actually making an investment into your flooring so that it last longer and looks better.

Mess: Although installation of wood flooring is practically mess free if the cutting is done outdoors, the removal process may create some unwanted dust. Instead of cleaning for days or weeks after floor removal, invest in a floor removal service like the one provided by Dustbusters. We can remove your wood floors in as little as a few hours with our dust free system which allows your installation team to come in right behind us, saving you time cleaning and getting your floors completed. Want a quote for our services? Give us a call today at 866-883-8783 to speak with a floor removal specialist!